Loading... Please wait...


Blog Categories
Recent Posts
- Home
- Getting Started with Fermented Foods: Cultured Dairy
Getting Started with Fermented Foods: Cultured Dairy
Posted by on

Most of us have seen or eaten cultured or fermented dairy at some point. Yogurt and sour cream are probably the most commonly consumed cultured dairy foods, though not all commercial varieties are truly cultured.
Today we will look at those and others that you can make at home and incorporate into your daily diet.
First of all let’s discuss the benefits of fermenting dairy:
- It contains friendly bacteria that are necessary for health. These bacteria help stave off candida overgrowth and improve digestion.
- It is better tolerated by those who might be sensitive to milk and cream.
- It improves the nutrient profile of the milk or cream.
- It extends the shelf life of milk or cream.
So, what are these cultured dairy products, how can we make them at home and how can we introduce them into our daily diet? I’ll share with you some tips from my own limited knowledge.
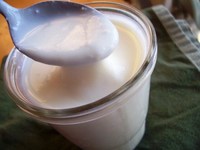
Yogurt

Almost all of us have had yogurt at one time or another. In fact I was pleasantly surprised to find out that “How to make yogurt in the crock pot” has been one of my most popular posts. Another thing that I have learned is that you can make raw yogurt without the use of a yogurt maker. I have a few different raw yogurt cultures that I hope to play with soon, but the basic method for raw milk yogurt goes something like this:
- In order to secure consistent results, you must first make a starter from the powdered culture and pasteurized milk.
- Combine said starter with raw milk and allow to culture in a warm place until thickened.
- Save the pasteurized culture for your next batch and continue making yogurt, preparing a new batch of starter when necessary.
- Chill in the refrigerator overnight for optimum consistency.
Yogurt can be eaten plain, with fruit and/or sweetener, used in smoothies, strained to make a delicious Greek yogurt or yogurt cheese and used in recipes like my yogurt ranch dip.
Buttermilk
Buttermilk is something that is also familiar to most of us, when it is in its cultured state. It is thick and tangy and adds a lovely flavor to baked goods and ranch dressing. Unlike the buttermilk that comes from the making of real butter, the buttermilk you buy in the store is cultured. But again, you can make it at home with raw milk. The basic method for raw buttermilk goes something like this:
- Create and maintain a pure starter by using pasteurized milk and the powdered culture.
- To make buttermilk combine 3/4 cup of raw milk with 1/4 cup of the pure starter, being sure to retain 1/4 cup of the starter for your next batch of pure starter.
- Allow to culture in a warm place for 12-18 hours.
Buttermilk can be used to add great texture and tang to baked goods, added to ranch dressing or you can even drink it straight from the cup.

Kefir
Kefir was fairly foreign and intimidating to me for quite a few years. I tried making some with grains from a friend, but without any instructions I failed and so did my kefir. With detailed instructions I was aware that the first few batches may not culture properly and so I used only a cup of milk for those. Knowing this, and with some patience, I was able to achieve true kefir by the third culturing. Since then we try to have at least a pint of this jewel on hand for smoothies and other dishes.
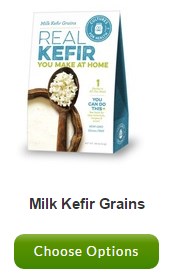
The basic method for raw kefir goes something like this:
- You will receive kefir grains (gelatinous cottage-cheese like lumps) along with a little bit of kefir.
- Dump both the grains and the kefir into about a cup of raw milk.
- Cover with cheesecloth or a cloth napkin secured with a rubber band.
- Leave in a warm place for 12-24 hours.
- Your first few batches may not “kefir”, thus leaving you with soured milk – which you can use for baking. Don’t be discouraged. Simply strain out the kefir grains and start another batch.
- You will know your milk has kefired when it is thick (won’t run up the sides when tilted) and smells slightly yeasty but pleasant.
- Strain or fish out the grains, place them in a clean jar, start another batch of kefir and refrigerate the old one.
- I have found that when I am pressed for time or am low on raw milk, I can put the finished kefir (with grains) in the refrigerator for a day or two before starting a new batch.
Our favorite way to eat kefir is in smoothies in combination with fruit. We also drink it plain or with a little vanilla and sweetener.
Crème Fraiche or Sour Cream
If you have some extra cream sitting around, you can make crème fraiche using your homemade buttermilk. The basic method for making crème fraiche or sour cream goes something like this:
- Mix about a cup of raw cream with approximately one tablespoon buttermilk.
- Allow to culture in a warm place until thickened.
- Refrigerate.
Use as a topping, a base for desserts, or anything that needs a dollop of delicious and nutritious.
Information provided in this communication is not designed to and does not provide medical advice, professional diagnosis, opinion, treatment or services to you or to any other individual. This is general information for educational purposes only. The information provided is not a substitute for medical or professional care, and you should not use the information in place of a visit, call consultation or the advice of your physician or other healthcare provider. Wise Choice Marketing Inc is not liable or responsible for any advice, course of treatment, diagnosis or any other information, services or product you obtain through Wise Choice Marketing Inc.